Instructions for flashing P2200 P2500 with Bichon4 main board (2.A.0.x, 3.A.0.x)
1. The program version must be 4.1 or higher
2. Remove the side cover from the USB cable connection side.
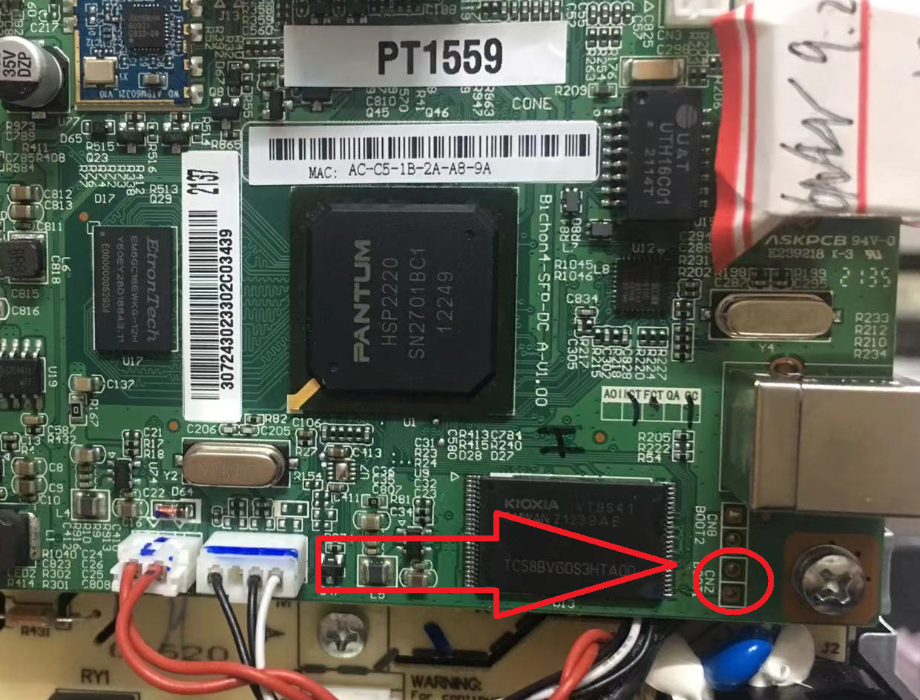
3. Close (with tweezers) the CN2 contacts and turn on the printer

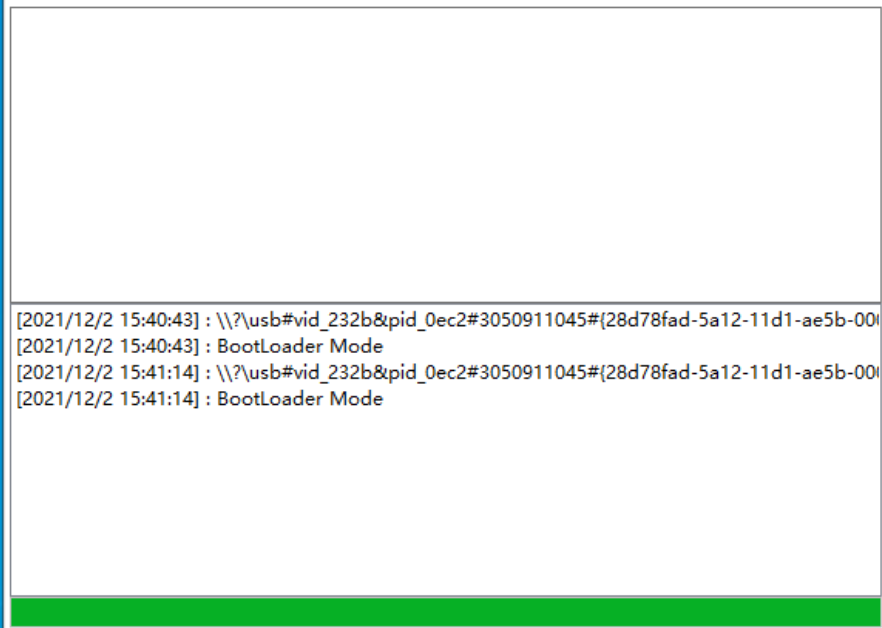
4. The device should turn on in Bootloader Mode, this can be checked by clicking the “Get Printer ID” button in the program.

5. Click the “Upgrade Firmware” button and select the file P2500_3.A.0.3_Boot.bin
6. Wait about 30 seconds until the green bar at the bottom of the program fills. After this, turn off (by holding down the power button for 5 seconds, or by disconnecting from the power supply) and turn on the device again.
7. Now the device should automatically enter Bootloader mode.
8. After all this, you can send chipless firmware by clicking “Upgrade Firmware” and selecting the file. No confirmation required. The firmware process can be quite lengthy, 5-10 minutes.
9. After successful completion, the bar at the bottom of the program will be completely filled and the device will reboot itself.
1. The program version must be 4.1 or higher
2. Remove the side cover from the USB cable connection side.
3. Close (with tweezers) the CN2 contacts and turn on the printer

4. The device should turn on in Bootloader Mode, this can be checked by clicking the “Get Printer ID” button in the program.

5. Click the “Upgrade Firmware” button and select the file P2500_3.A.0.3_Boot.bin
6. Wait about 30 seconds until the green bar at the bottom of the program fills. After this, turn off (by holding down the power button for 5 seconds, or by disconnecting from the power supply) and turn on the device again.
7. Now the device should automatically enter Bootloader mode.
8. After all this, you can send chipless firmware by clicking “Upgrade Firmware” and selecting the file. No confirmation required. The firmware process can be quite lengthy, 5-10 minutes.
9. After successful completion, the bar at the bottom of the program will be completely filled and the device will reboot itself.
